
From Prototype to Production IoT Product Development Made Simple
- Gulshan Sharma
- Jul 20
- 10 min read

A working IoT prototype can be built in a week. A reliable IoT product can take months of hardware revisions, firmware testing, compliance work, supply chain decisions, and manufacturing setup. The difference is not ambition. It is process.
An IoT device has to survive the real world. It may run on a small battery, connect through weak Wi-Fi, report sensor readings in heat or dust, and receive firmware updates years after launch. That makes IoT product development a systems problem. Electronics, mechanics, firmware, cloud services, testing, and manufacturing all affect each other.
This guide walks through the journey from early electronics development to prototyping and mass manufacturing, with practical examples from connected sensors, smart home devices, industrial trackers, and consumer wearables.

IoT product development starts with the system architecture
Before a board layout or enclosure design matters, the product team needs a clear answer to one question:
What must the device do in the real environment where it will be used?
A smart water leak sensor under a sink has different needs than an industrial vibration monitor on a pump. The leak sensor may sleep for months, wake only when water is detected, and use Bluetooth Low Energy or Wi-Fi. The vibration monitor may sample data constantly, handle electrical noise, and send data over LTE-M or Ethernet.
Early architecture decisions usually cover:
Power source and expected battery life
Wireless technology, such as Wi-Fi, BLE, Thread, Zigbee, LoRaWAN, LTE-M, or NB-IoT
Sensor type and measurement accuracy
Processing needs on the device versus in the cloud
Security model, including authentication and update signing
Enclosure requirements, such as water resistance or impact protection
Compliance targets, including FCC, CE, RoHS, UL, or industry-specific rules
A common mistake is choosing parts only because they are easy to use in a demo. The ESP32, for example, is popular because it combines Wi-Fi, Bluetooth, enough processing power for many products, and a broad developer community. It is a sensible choice for many connected prototypes. For a battery-powered device that must last years, a lower-power microcontroller from Nordic Semiconductor, Silicon Labs, STMicroelectronics, or Texas Instruments may fit better.
The best early decision is not always the cheapest component. It is the one that keeps the product testable, manufacturable, and supportable.
Electronics development turns the idea into a workable device
Electronics development is where the product’s behavior starts to become physical. Engineers select components, design schematics, create PCB layouts, and plan power, signal, and wireless performance.
This stage usually includes three connected workstreams:
Hardware design
Firmware architecture
Mechanical and enclosure planning
For IoT products, separating those workstreams too much causes problems. Antenna placement depends on the enclosure. Battery life depends on firmware sleep states. Sensor accuracy can depend on heat from nearby regulators or radios.
Teams often treat Electronics Product Developmetn, Firmware development, and Hardware Development as separate tracks, but successful IoT products keep them connected from day one.
Key challenges in electronics development
Power budget errors
Battery life claims often fail because early estimates ignore real radio behavior. A Wi-Fi module can draw high current during transmit bursts. A BLE sensor may draw almost nothing while sleeping, then spike when advertising or connecting.
A practical power budget should include:
Sleep current
Sensor sampling current
Radio transmit and receive current
Voltage regulator losses
Battery self-discharge
Cold temperature performance
For example, a coin-cell BLE temperature beacon can last a long time if it wakes briefly and advertises small packets. The same coin-cell product may fail quickly if firmware keeps a sensor powered or connects too often.
Wireless performance surprises
A PCB antenna that works on an open bench can perform poorly inside a plastic enclosure, near a battery, or beside a metal mounting surface. Many radio vendors publish layout guidance, and it should be followed closely. Deviating from the recommended antenna keep-out area can reduce range.
Apple’s AirTag offers a familiar consumer example of careful radio integration. It combines Bluetooth, Ultra Wideband in supported iPhones, a speaker, and a replaceable coin-cell battery in a compact casing. The product looks simple, but the RF, power, and mechanical choices are tightly linked.
Component lifecycle risk
A prototype can use whatever is available online. A production device cannot. Parts must be available in volume, from trusted suppliers, with known lead times. During the 2020 to 2022 semiconductor shortage, many hardware teams learned that a design based on a single unavailable chip can stall for months.
Best practice is to identify alternate components early, especially for power regulators, sensors, memory, connectors, and radio modules.
Best practices for electronics development
Start with a written product requirements document. Keep it short, but include measurable targets.
Good requirements sound like this:
The device must report temperature from 32°F to 122°F.
The device must last at least 12 months on two AA batteries under the defined reporting schedule.
The enclosure must meet an IP rating suitable for splash exposure if installed near plumbing.
The product must support secure firmware updates.
Next, build around known reference designs when possible. Chip vendors such as Nordic Semiconductor, Espressif, STMicroelectronics, and Texas Instruments publish evaluation boards, layout guides, and example schematics. These do not remove engineering work, but they reduce guesswork.
Then review the schematic and PCB layout before ordering boards. A design review can catch missing pull-up resistors, wrong connector pinouts, poor antenna placement, and test pads that were forgotten.
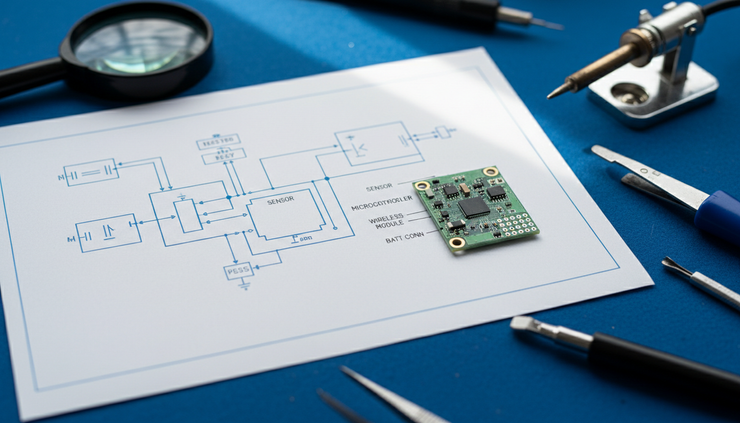
Prototyping proves the product before money gets expensive
Prototyping is not one step. It is a sequence of learning cycles. Each version should answer specific questions.
Early Electronics Prototyping may use development boards, jumper wires, lab power supplies, and 3D-printed enclosures. Later prototypes should look and behave more like the intended final product.
A useful prototype roadmap might include:
Prototype stage | Main goal | Typical build method |
Proof of concept | Show the core function works | Dev boards, breadboards, sample sensors |
Engineering prototype | Test custom electronics and firmware | Custom PCB, basic enclosure |
Design validation build | Verify performance and usability | Near-final PCB and enclosure |
Production validation build | Prove the factory process | Production-intent tooling and fixtures |
What each prototype should test
A proof-of-concept connected air quality monitor may only need to show that the sensor reads data and sends it to a dashboard. At this point, the enclosure can be rough and the firmware can be simple.
An engineering prototype should test the custom PCB, sensor placement, power behavior, and radio performance. The team should measure current draw with tools such as a Nordic Power Profiler Kit, Joulescope, or similar instrument rather than relying only on datasheet estimates.
A design validation prototype should face real-world conditions. If the product is meant for a garage, test it in temperature swings. If it mounts near machinery, test vibration. If it relies on Wi-Fi, test through walls and with consumer routers.
A production validation build should confirm that the device can be assembled, programmed, calibrated, and tested repeatedly.
Real-world example from smart thermostats
Smart thermostats show why prototyping needs both engineering and user testing. A thermostat must read temperature accurately, control heating and cooling signals, connect to Wi-Fi, and remain safe inside a wall-mounted enclosure.
Google Nest thermostats became known for compact design and connected controls, but products in that category face practical engineering constraints. Wall cavities can affect temperature readings. HVAC wiring varies by home. Wi-Fi reliability changes by location. A prototype that works in one lab setup may fail with real installation conditions.
That is why mature IoT teams create installation test matrices. They test common wiring setups, weak network conditions, power interruptions, and recovery from failed updates.
Best practices for prototyping
Define the question before building
A prototype should answer a question, not just look more finished. Examples include:
Can the battery meet the target life under real reporting intervals?
Does the antenna meet range needs inside the enclosure?
Can the device recover after losing power during an update?
Can assembly staff program and test the unit in under a repeatable time target?
Instrument everything
Add test pads, debug headers, serial logs, and firmware build identifiers. A sealed prototype with no test access slows debugging.
Test failure paths early
IoT devices fail in boring ways. Wi-Fi credentials change. Batteries sag. Servers reject expired certificates. Users unplug gateways. Firmware updates stop mid-download.
A good prototype includes recovery behavior for these cases.
A prototype that only works under perfect conditions has not proven the product. It has proven the demo.

Firmware and cloud choices shape the product experience
Firmware is where hardware becomes a product people can trust. It controls sensors, radios, power states, data storage, user inputs, security, and updates.
A good firmware architecture for IoT products usually includes:
A hardware abstraction layer for easier board revisions
Power state management
Secure boot or signed firmware updates where supported
Local data buffering when connectivity fails
Versioned configuration
Clear error logging
Factory test modes
Over-the-air updates deserve special attention. Once a device ships, firmware fixes may be the only practical way to improve it. A bad update system can brick devices or create support costs that wipe out hardware margins.
The Matter smart home standard, backed by the Connectivity Standards Alliance, shows how much value the industry places on interoperability and update paths. Matter does not solve every IoT problem, but it reflects a larger trend: products need to work across ecosystems and keep working after launch.
Security also starts in firmware. At minimum, teams should avoid hardcoded shared passwords, protect private keys, and encrypt sensitive communication. For consumer devices, the US Federal Communications Commission has also moved toward stronger cybersecurity labeling for connected products, which signals where regulation is heading.
Mass manufacturing turns prototypes into repeatable products
Mass manufacturing is where optimistic assumptions meet production reality.
A lab team can hand-solder one sensor wire and call it done. A factory needs clear assembly instructions, reliable suppliers, automated test fixtures, packaging rules, and quality control checkpoints.
Design for manufacturability starts before the factory
Design for manufacturability, often called DFM, means shaping the product so it can be built consistently.
For electronics, that includes:
Choosing components available in reel packaging for automated placement
Keeping PCB panelization in mind
Avoiding unnecessary hand-soldered parts
Adding test points for in-circuit test or functional test
Using connectors that can survive assembly
Designing labels and traceability into the process
For enclosures, DFM includes draft angles for injection molding, screw boss strength, wall thickness, gasket design, light pipes, and tolerance stack-ups.
Injection molds can cost thousands to tens of thousands of dollars depending on part size, steel choice, finish, and complexity. That is why teams often use 3D printing or urethane casting before committing to tooling.
Production testing must be designed like a product
Every manufactured IoT device needs a way to prove it works before shipment.
A typical production test may check:
Power consumption
Firmware programming
Sensor response
Radio transmission
Button or LED behavior
Unique device ID
Cloud provisioning
Calibration data
Final enclosure inspection
For a LoRaWAN agriculture sensor, production testing might verify that the device can transmit at the expected frequency band for the target market, read soil moisture within a calibration range, and enter low-power sleep after setup.
For a Wi-Fi smart plug, testing might verify relay operation, current sensing, insulation safety, MAC address assignment, and app onboarding.
The test fixture matters. If a fixture is slow, fragile, or confusing, it becomes a production bottleneck. A clear pass or fail result, stored with serial numbers, can save hours during later support investigations.

Common mistakes that delay IoT production
Several problems appear again and again in connected product programs.
Treating compliance as a final step
FCC Part 15 testing for radio devices in the United States, CE marking in Europe, and safety testing where required should influence design early. Pre-scan testing can catch emissions problems before final certification.
Ignoring calibration
Sensors are not magic. Temperature, humidity, gas, pressure, and current sensors can drift or vary by unit. If the product claims useful measurement accuracy, calibration and verification need a plan.
Forgetting provisioning
Every connected device needs identity. That may include certificates, keys, MAC addresses, QR codes, serial numbers, or cloud records. A weak provisioning process can cause duplicate IDs, failed onboarding, or security issues.
Shipping without observability
After launch, teams need to know what is happening in the field. Device health metrics, firmware version counts, update success rates, and connection failure codes help diagnose issues without asking users to reproduce every problem.
A simple roadmap from idea to shipment
A practical IoT development roadmap looks like this:
Define the product requirements and environment.
Select the wireless technology, sensor architecture, and power plan.
Build a proof of concept using dev boards.
Design the first custom PCB and basic enclosure.
Measure power, range, thermal behavior, and sensor accuracy.
Build design validation prototypes.
Run compliance pre-checks and reliability tests.
Finalize DFM, test fixtures, and supplier choices.
Build a small pilot run.
10. Fix production issues before scaling volume.
Skipping steps rarely saves time. It usually moves problems into a later stage where each change costs more.
FAQ
How long does IoT product development take?
A simple proof of concept can take days or weeks. A production-ready IoT device often takes several months or more, especially if it needs custom hardware, an enclosure, wireless certification, cloud integration, and manufacturing test fixtures.
What is the hardest part of building an IoT product?
The hardest part is usually integration. The electronics may work alone, the firmware may pass unit tests, and the cloud may function in isolation. Problems appear when power limits, network failures, enclosure constraints, manufacturing tolerances, and user behavior meet.
Should an IoT product use a wireless module or a chip-down radio design?
A certified module can reduce RF design risk and may simplify certification work. A chip-down design can lower unit cost at high volume, but it requires stronger RF engineering and more validation. Many teams start with a module, then revisit chip-down only when volume justifies the work.
When should manufacturing partners get involved?
Bring manufacturing input in before the PCB and enclosure are final. Early DFM feedback can prevent hard-to-assemble connectors, missing test pads, weak plastic features, and packaging choices that slow the line.
Why do IoT prototypes fail during production?
They often fail because the prototype was hand-built, hand-tested, or built with parts that are not suitable for volume. Production needs repeatable assembly, stable suppliers, clear calibration, device provisioning, automated tests, and documented quality checks.
The takeaway
IoT product development is a journey from possibility to repeatability. Electronics development proves the architecture. Prototyping exposes real-world behavior. Mass manufacturing turns a working design into a product that can be built, tested, shipped, and supported at scale.
The simple path is not the one with the fewest steps. It is the one where each stage answers the right questions before the next stage gets expensive.


Comments